Controlling Arduino with Email
Controlling Arduino with Email
Here I am taking the advantage of the Node-RED tool and the email service to build a simple but awesome IOT control unit.
You can remotely control your Arduino board by sending an email to your own account. The process roughly takes half an hour, with minimum coding required.
Node-RED is a visual programming tool for Internet of Things. IBM is actively bringing its latest functions, including Waston and IOT service, into the toolbox ever since its acquisition. We are using Node-RED to demonstrate how to setup a simple connected IOT control hub.
System Environments
Hardware list:
- Mac OS 10.11.5
- Arduino Uno board of your choice, I am using one from DFRobot
Software setup
Flash Firmata into Your Uno Board
There is a nice tutorial for you.
Install Node-RED
Please follow the official Arduino documentation from Node-RED.
As soon as you get past the first blinking example, you can start to go to the IOT part.
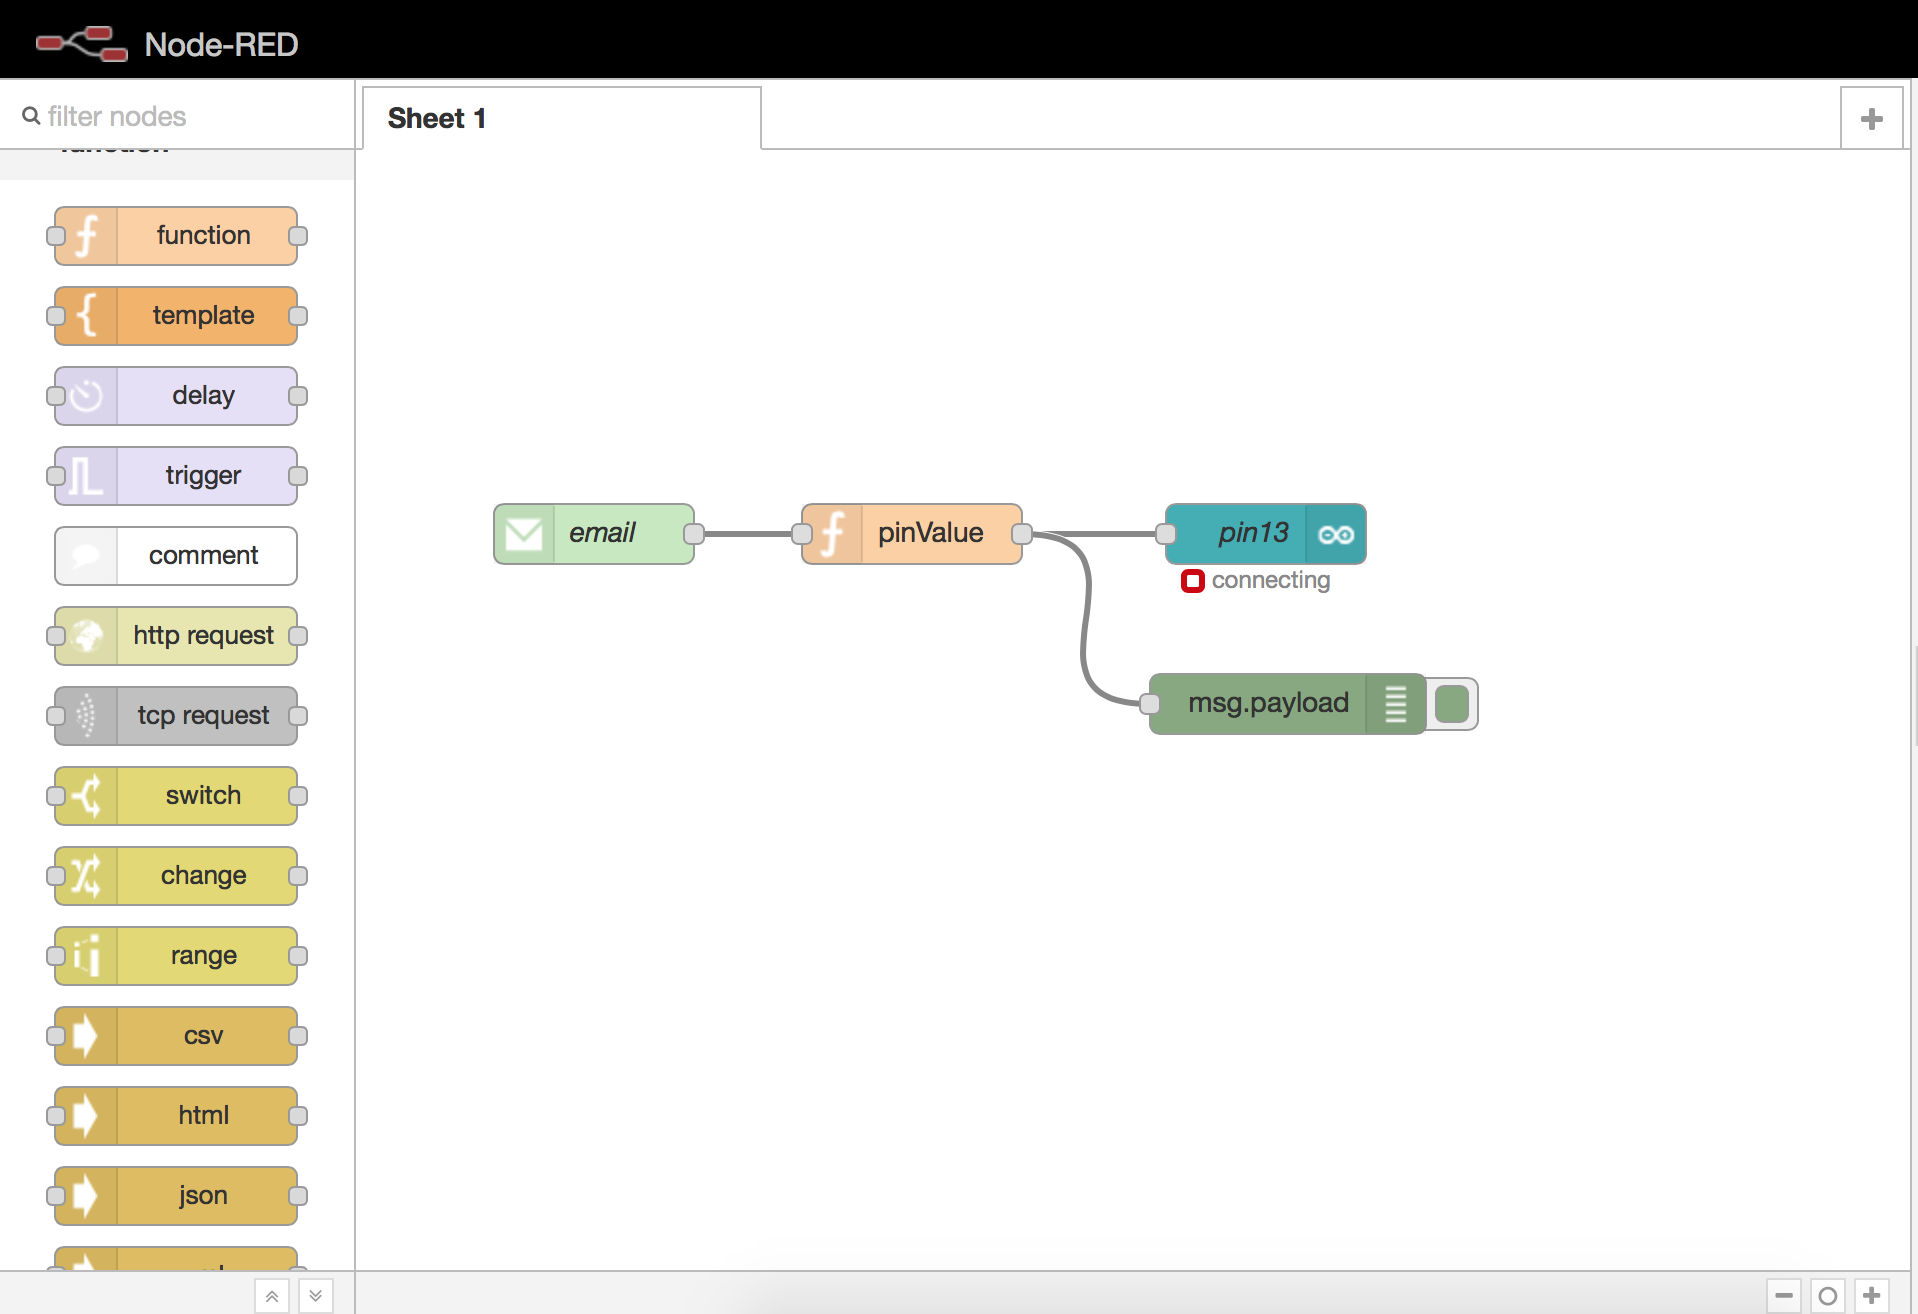
Build Control flow
Here is the simple flow setup.
Configure Email Node
Now we can configure the email node. I am using the Microsoft office email server. If you are using other
email service providers, please check your server settings for setting up an imap client.
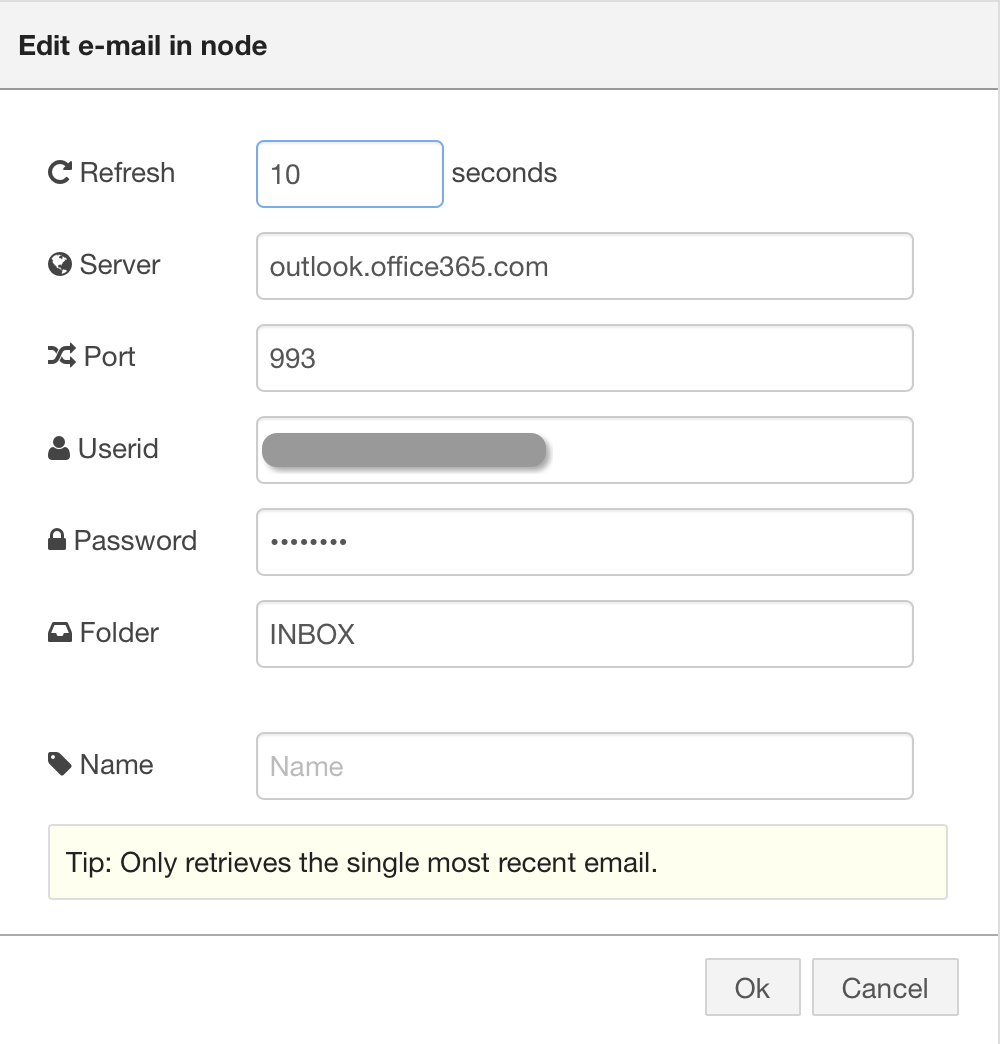
And also if you are using Gmail, you need to create an application specific password for third-party application authentication.
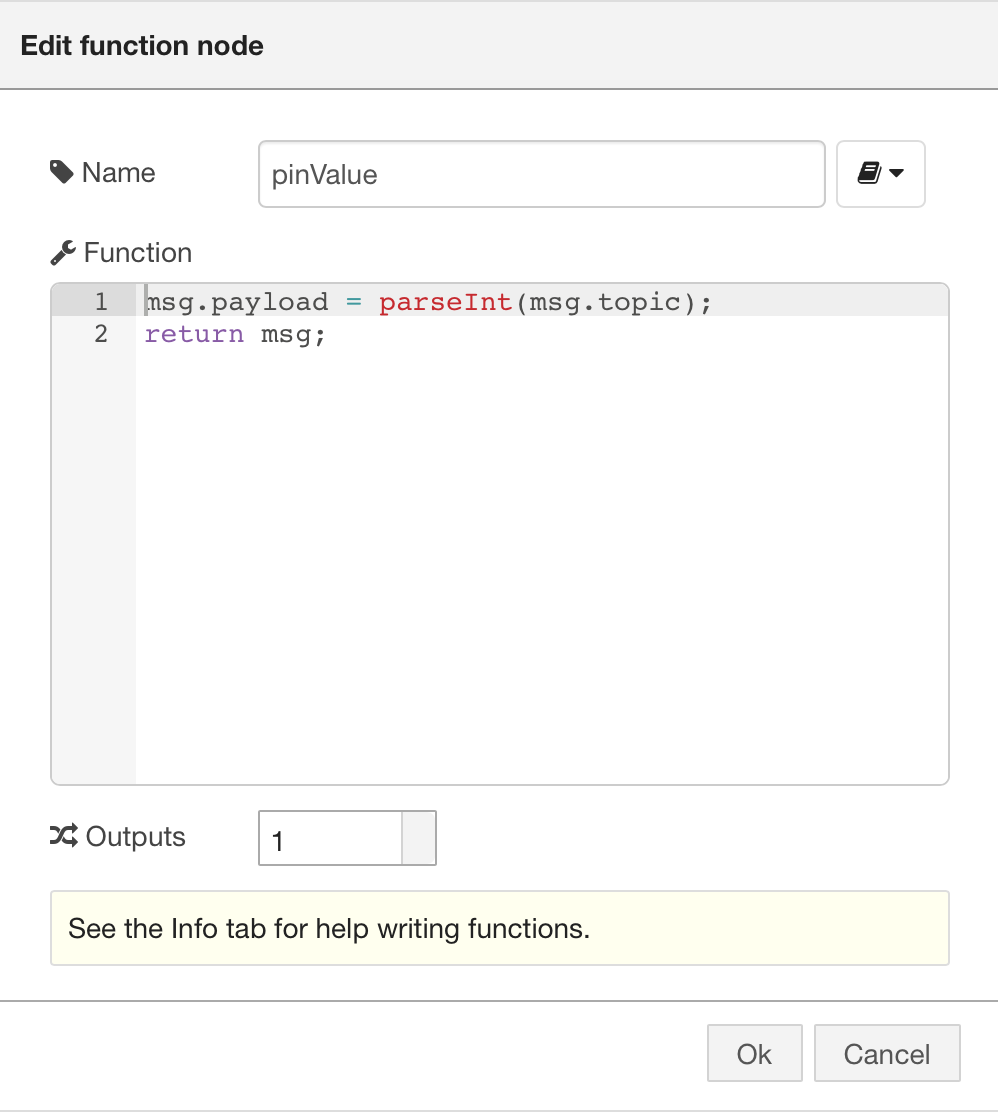
Configure Function Node
We need a tiny bit of code to interpret the email messages before relay that on to your Arduino board.
Specifically, we are using the email’s subject to control our Arduino board. Because some server may automatically attach or transform the email body content or format for better user experience (in its own opinion), it would be easier to write working code for our example using only the email subject.
Here is the code
    msg.payload = parseInt(msg.topic);
    return msg;
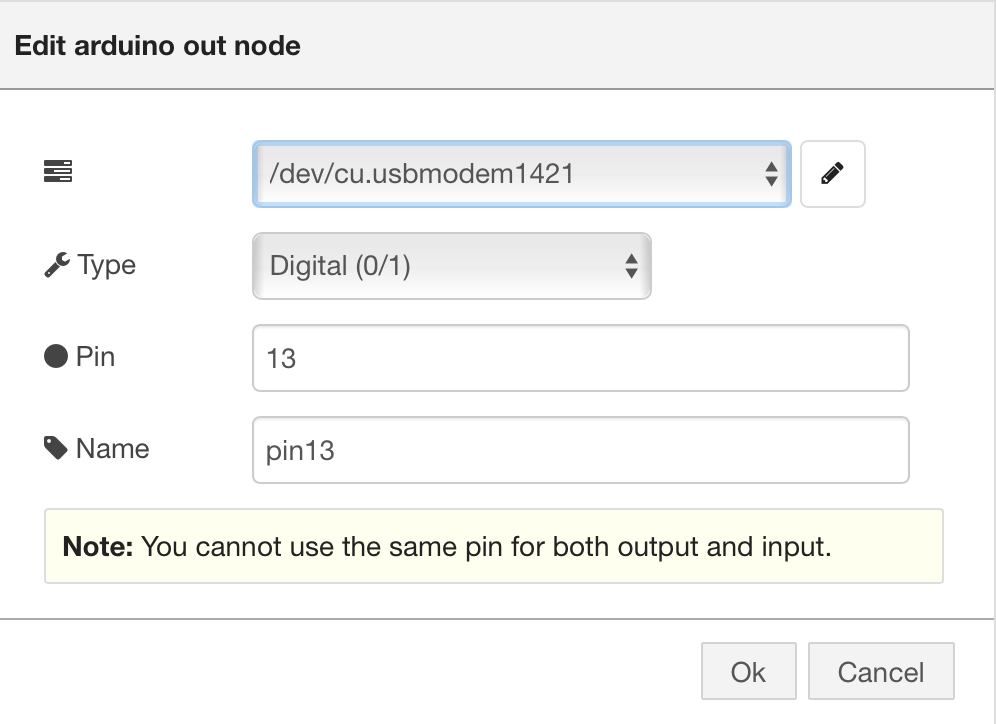
Configure the Arduino LED Node
You should have configured the LED node on pin 13 already if you have passed the example. But here is a screenshot just in case.
Test
Now you can send an email to your account, with the subject of a single digit: 1( or 0 if your pin 13 LED is already turned on). You should see the LED on the board change after about 10 or 20 seconds after you have sent the email.
You can leave the email body empty, we are not going to use that part for now. However you can choose to try more tricks with the email body once you feel more confident.
How It Works
According to Node-RED documentation, the email node will try to get your latest email from the given mail folder between the given time interval. It will notice any new email, and pass on email information to our logical function. Then our function tries to interpret the subject to an integer and fill in the data our Arduino output pin needs. Finally the Arduino pin node controls the board using firmata protocol and changes the LED status.
I really wish you had fun using Node-RED and Arduino. Firmata is a great way to communicate with the board, and Node-RED surely is a fast way to build IOT control layer. Plus you don’t have to pay for email service these days, so you don’t even need to buy public domain IP address to remotely control your board across different network domains. All you need is something that runs nodejs with a serial port. On that part I would recommend either the Raspberry Pi (runs Linux based system )or the LattePanda ( runs standard windows 10).